Create Your Own Portfolio Website for Free Using Django
Jul 21, 2024
•03:18 AM GMT+8

Have you ever wondered if you can deploy your Django portfolio using a free Platform-as-a-Service (PaaS) service? I'm here to guide you on how to deploy my ready made portfolio template.
Getting Started! 🚀
In this project, we will use my ready made portfolio template. I used HTML, CSS, and JavaScript for the front end and Django for the back end. Last year, I created my portfolio website to showcase my expertise in backend development, including Automation, DevOps, Linux Administration, and Python scripting. In addition, I will also show you how to update the data in your portfolio.
Set up local environment
To begin this task, set up a local environment for the development process. Create a virtual environment and activate it. I use Python 3.12 for this.
# Create Environment and Activate
python -m venv vercel_env
source vercel_env/bin/activate     # This command for Linux
vercel_env\Scripts\activate        # This command for Windows
Next, let's now proceed to clone the repository.
# Clone the repository
git clone https://github.com/git-adrianrubico/Django-Portfolio-Vercel.git
Once the cloning process is complete, we will proceed to install the necessary packages and modules.
# Install module requirements
cd Django-Portfolio-Vercel
pip install -r requirement.txt
Create your super admin user for your Django portfolio.
python manage.py createsuperuser
Create a .env file on the Django-Portfolio-Vercel directory to securely store configuration settings, environment variables, and sensitive information.
touch .envGenerate a new SECRET_KEY for your project and store it in the .env file. This is important for cryptographic signing, hash creation, and token generation for sensitive information, such as CSRF tokens and password reset tokens. Django uses a salt stored in the SECRET_KEY variable for these purposes.
python manage.py shell
from django.core.management.utils import get_random_secret_key
print(get_random_secret_key())
Protect Your Contact Form with reCAPTCHA
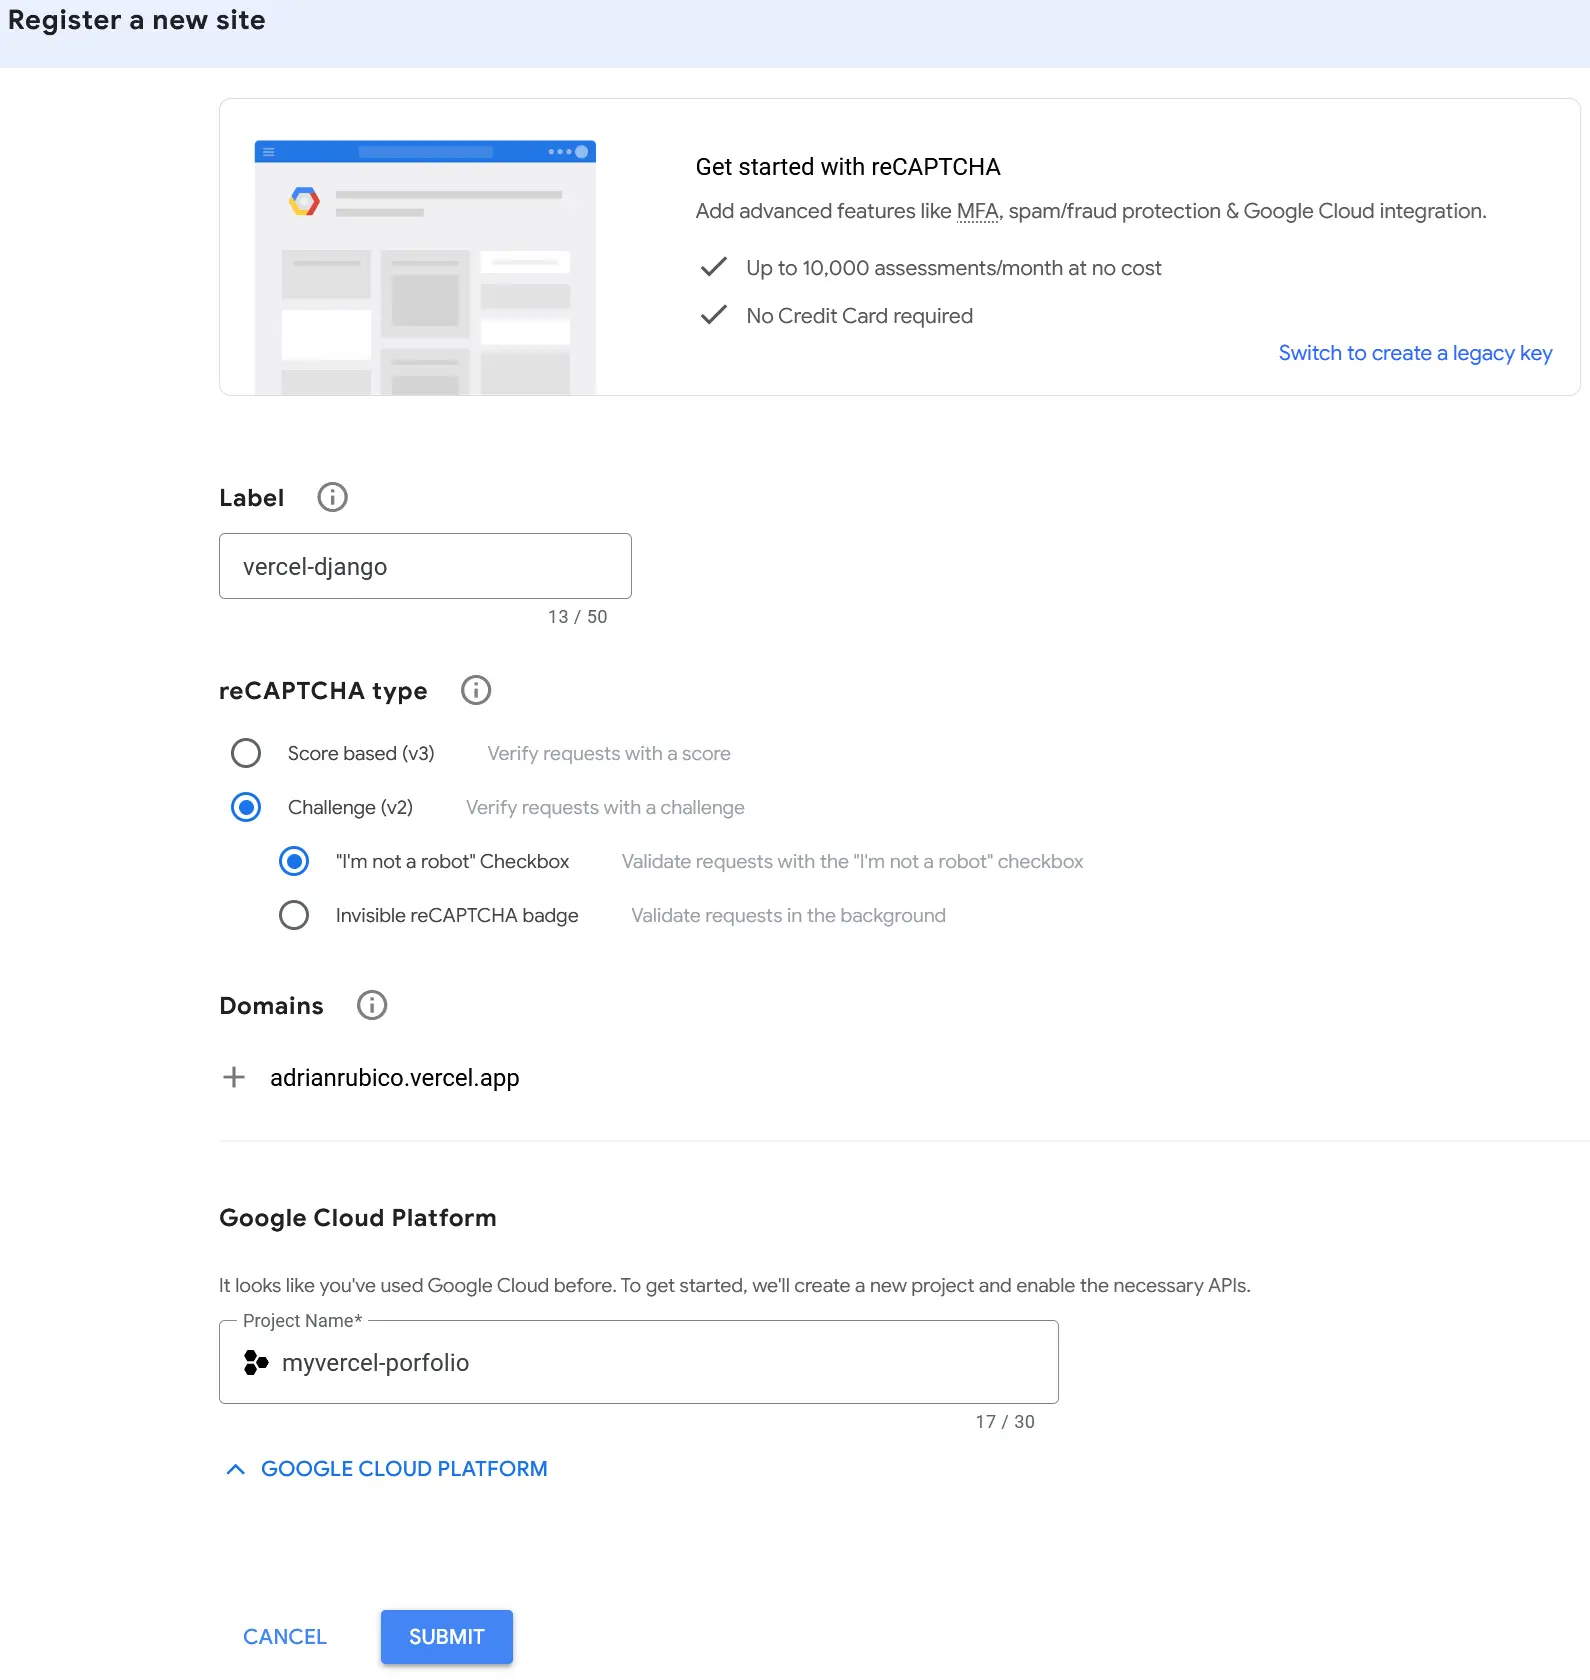
Create and generate reCAPTCHA verification for your Contact form. This is a free service from Google that helps protect websites from spam and abuse. Visit this website reCAPTCHA to get started!
You may follow the screenshots below on how to configure my reCAPTCHA.

Once you meet the requirement, click submit. Then, copy & paste those site keys to your .env file.

Setting Up Email in Django Portfolio
To allow users to send you emails, this guide will demonstrate how to configure SMTP settings in your Django portfolio.
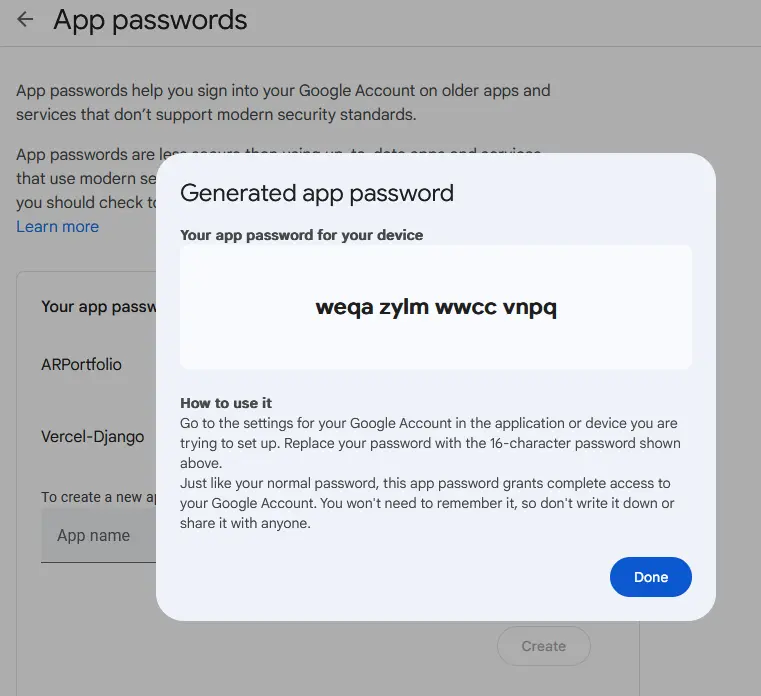
Go to your My Google Account, then search for "App Password" in your account settings.

Input your suggested app name, for example, "Vercel-Django", and then click Create. After generating a password, you must input it into the .env file.

The contents of your .env it looks like this

Personalize Your Portfolio
After configuring all the requirements mentioned above, we can begin customizing the pre-made portfolio content.
Access the 127.0.0.1:8000/admin to your browser and log in with your super admin user account.

After logging in, click "Personals" model to edit your name and other details, including your mini description, CV description, role, links and more. In this example, we will change the existing name to "Juan De la Cruz" and then save the changes.

Once updated, the necessary information will automatically appear on your "Home" page and "Digital CV" page.


Deploy our Portfolio to Vercel
After editing all the necessary information, we can deploy your portfolio to Vercel. To successfully deploy, we need to hide the admin URL in urls.py.
# config/urls.py
from django.contrib import admin
from django.urls import path, include
from django.conf.urls.static import static
from django.conf import settings
urlpatterns = [
    # For Dev only
    # path('admin/', admin.site.urls),
    path('', include("apps.portfolio.urls")),
]
handler404 = "apps.portfolio.views.handle_not_found"
urlpatterns += static(settings.MEDIA_URL, document_root=settings.MEDIA_ROOT)
Additionally, the ALLOWED_HOSTS must configured as well in the settings.py.
# config/settings.py
# Production
ALLOWED_HOSTS = ['.vercel.app']
Once we complete modifying the configuration, push all the changes to the repository.
git add .
git commit -m "Go-Live Vercel"
git push
Next, you need to create an account on the Vercel website. In my case, I used Single Sign-On (SSO) with a GitHub credential to easily create an account. After creation of your account, click Import to add your repository from you Github account.

Click "Install" to install the GitHub application for your Vercel account.

Click "Install" to install the GitHub application for your Vercel account. And then, you must select the repository of your Django Portfolio.


Click "Import" to start to begin the deployment.

Copy & paste the .env file on the Environment Variables, then click "Deploy".

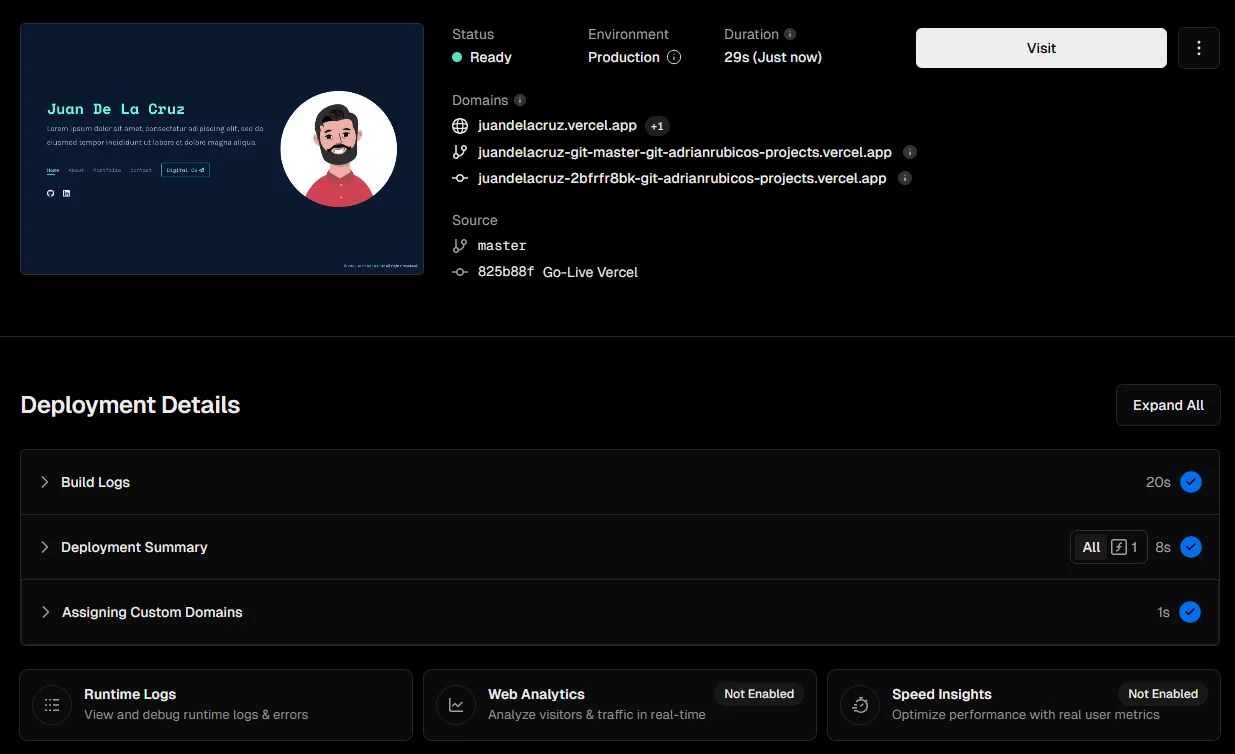
After the deployment is complete, your Django Portfolio website will be accessible. Here is a sample link juandelacruz.vercel.app to demonstrate our success in this task.

Final Thoughts and Next Steps
Creating your portfolio website with Django is a great way to showcase your skills and gain valuable experience. Following this guide and using the provided template, you've set up a professional portfolio for your domain service.
If you wish to serve static files and images, you can follow this guide for detailed instructions.
Happy coding, and may your portfolio help you land the opportunities you aspire to!
Create Your Own Portfolio Website for Free Using Django
Learn how to create and host your custom portfolio website for free with Django and deploy it on Vercel.
For the passion of automated cloud solutions.
Subscribe to get the latest posts. I mostly write about Backend (Python/Bash), DevOps and Linux.