Day 10: Navigating the Basics of Git and GitHub
Sep 14, 2024
•06:20 PM GMT+8

In this part of our journey into Git, we will look at some practical tasks to help us understand the basics of Git and GitHub. These tasks will give us hands-on experience with essential Git commands, from setting up a local repository to pushing changes to a remote repository on GitHub. Upon completing this guide, we will have a strong foundation to build upon as we progress to more advanced Git topics.
Tasks
Local Repository Setup
A local repository is where the project begins. It is a directory on the computer where Git tracks all changes. Here is how to set up a local repository:
- Set the username and email address:
This information will be associated with every commit we make.
git config --global user.name "git-adrianrubico"
git config --global user.email "adrianrubico@icloud.com"- Create a directory:
Choose a location on the computer and create a new directory for our project.
mkdir 90DaysDevOpsChallenge
cd 90DaysDevOpsChallenge- Initialize the directory with Git:
Turn your directory into a Git repository.
git init- Create a
README.mdfile:
Add aREADME.mdfile to describe your project.
echo "#90DaysDevOpsChallenge" > README.md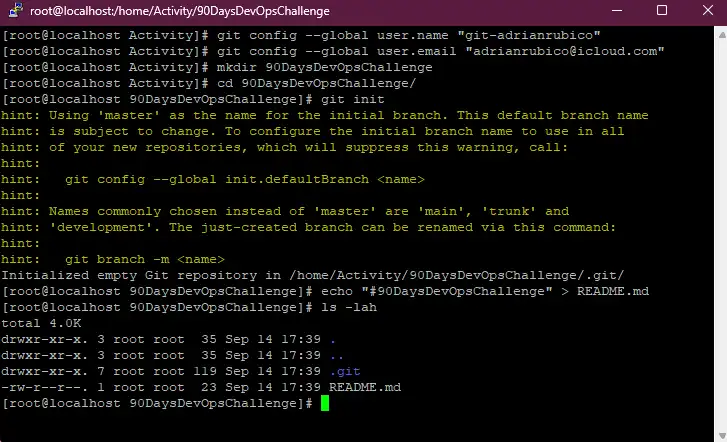
Setup Remote Repository
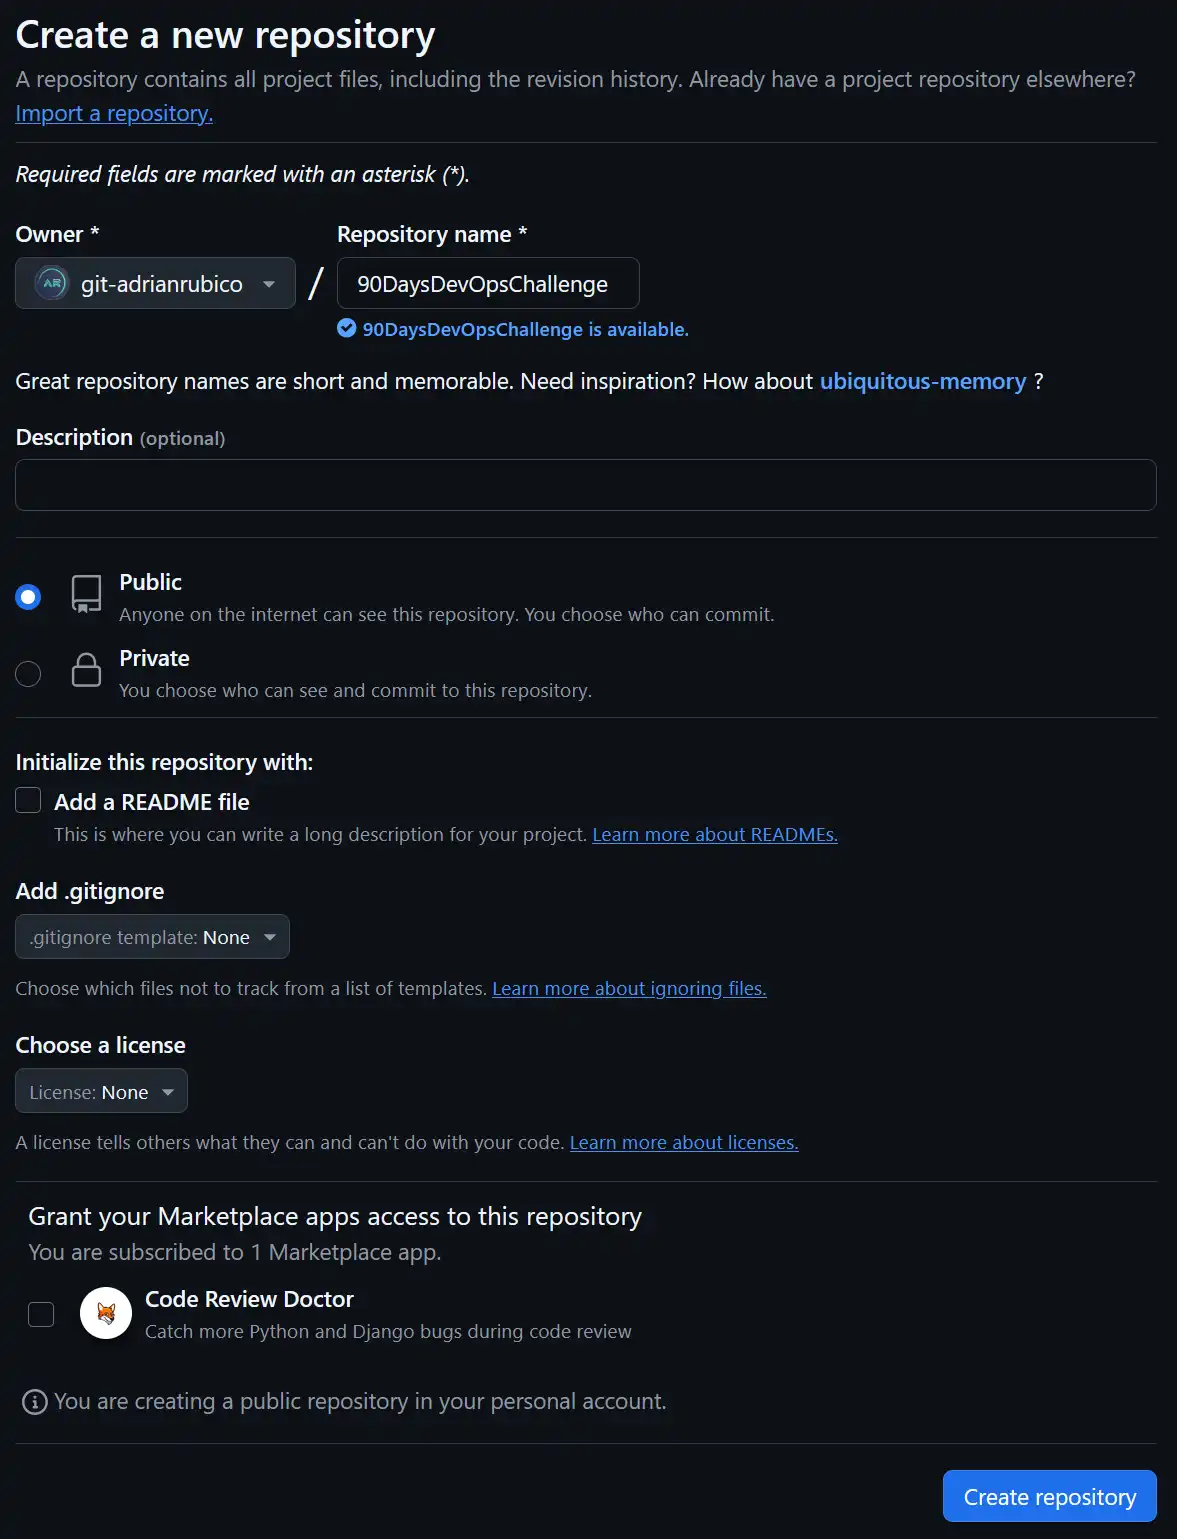
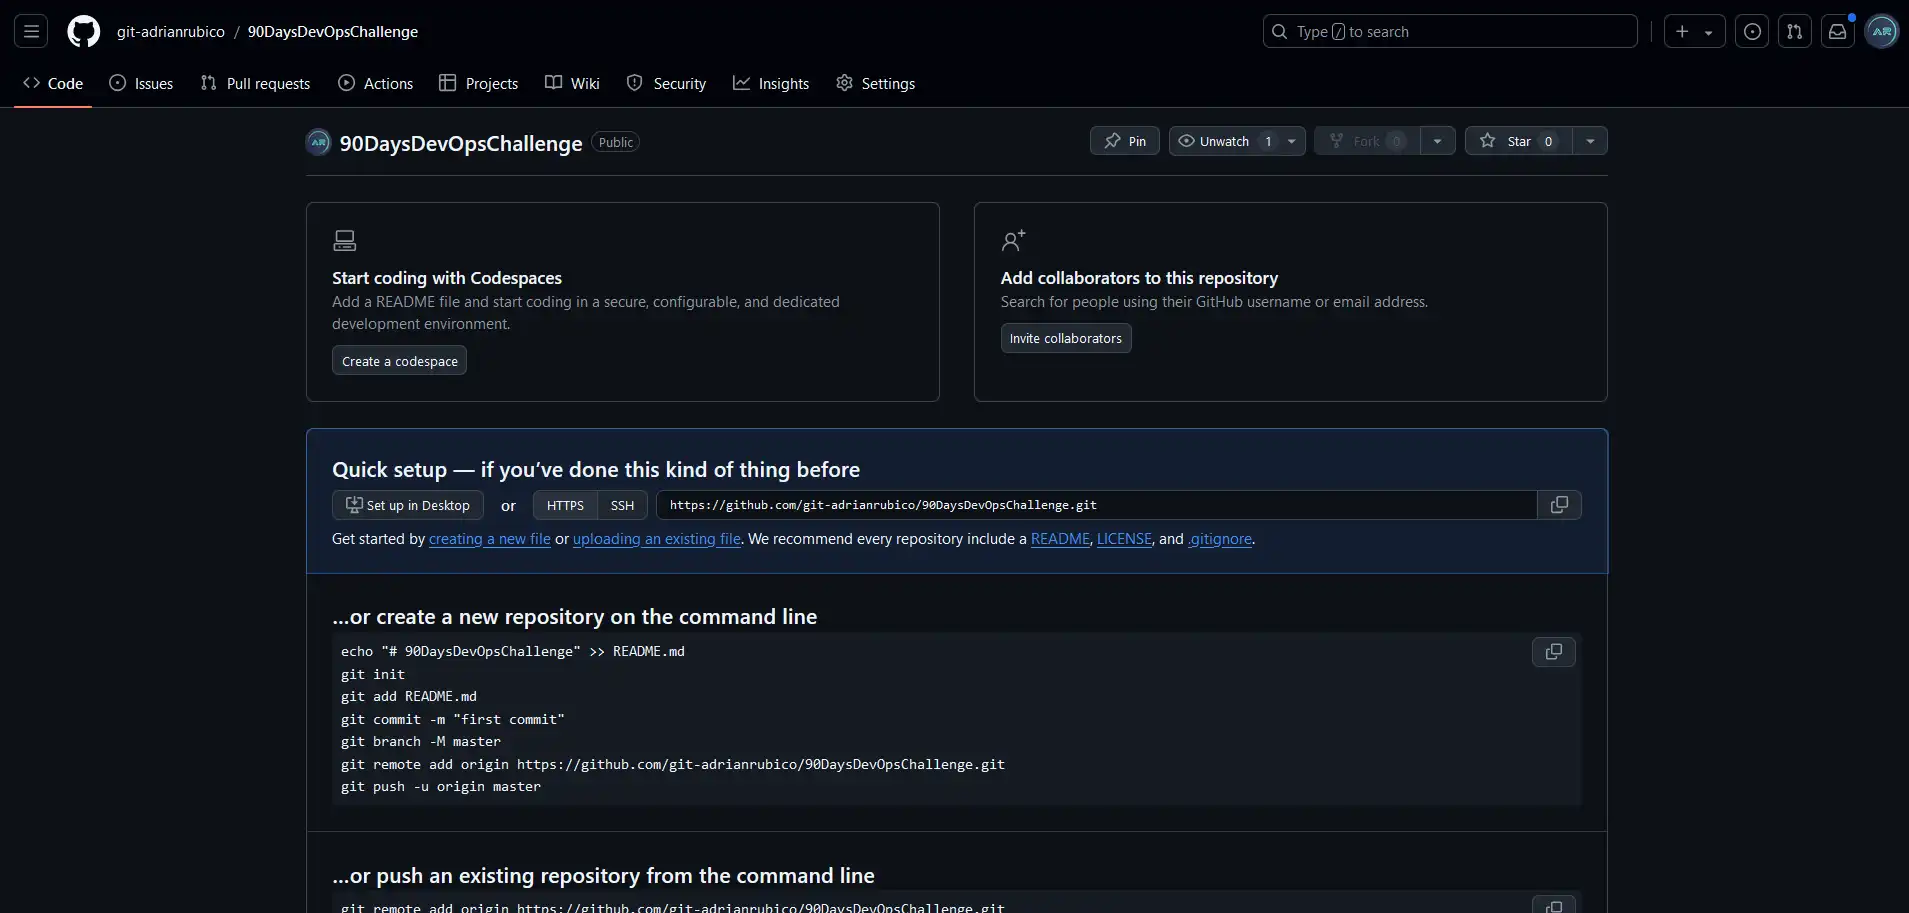
The remote repository is a platform like GitHub where you can share, collaborate, and manage your code. Follow these steps to set up your remote repository:
- Create Github Account:
If you haven't already, go to Github and create an account. - Create a new repository on Github:
Name it90DaysDevOpsChallenge.
Integrate Local Repository to Remote Repository
Now, let's connect local repository with our Github repository:
- Add the remote repository:
Link your local repository to the remote one on Github.
git remote add origin https://github.com/git-adrianrubico/90DaysDevOpsChallenge.git- Commit your changes:
Stage and commit your files.
git add .
git commit -m "Initial commit"- Push to Github:
Send your changes to the remote repository.
git push origin master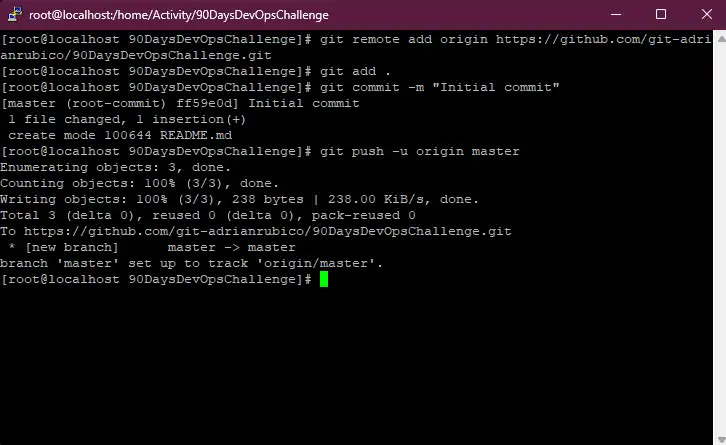
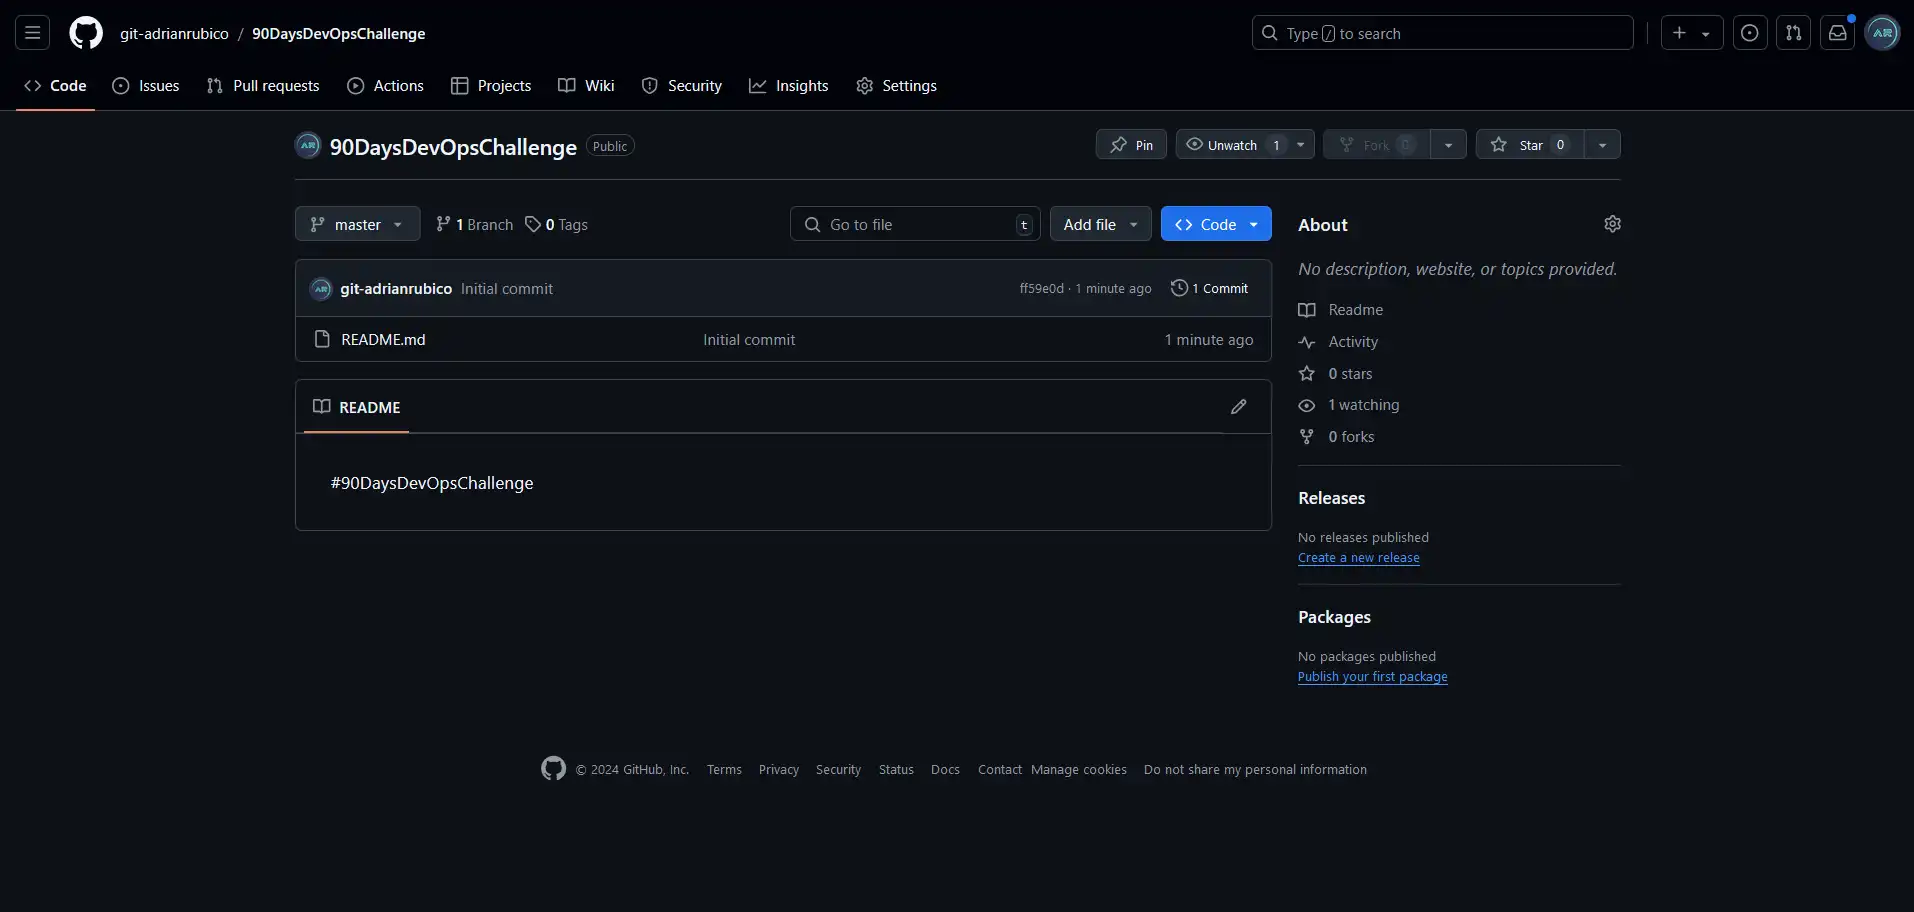
💡 You may change the name of your default branch in the these following process "Go to your repository" ➡️ "Settings" tab ➡️ "Default branch" section.
Create a New File and Add Some Contents
Now, let's create a new file, add some content, and push it to Github:
- Create a new file:
For example, create a file namedexample.txt.
echo "This is an example text." > example.txt- Check the status:
See which files have changed and are ready to be committed.
git status- Stage and commit your new file:
Add the file to the staging area and commit it.
git add example.txt
git commit -m "Add example.txt"- Push the file to Github:
Send the changes to the remote repository.
git push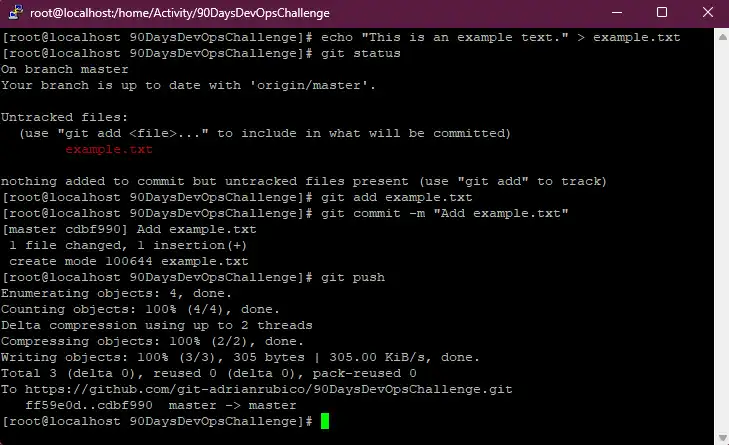
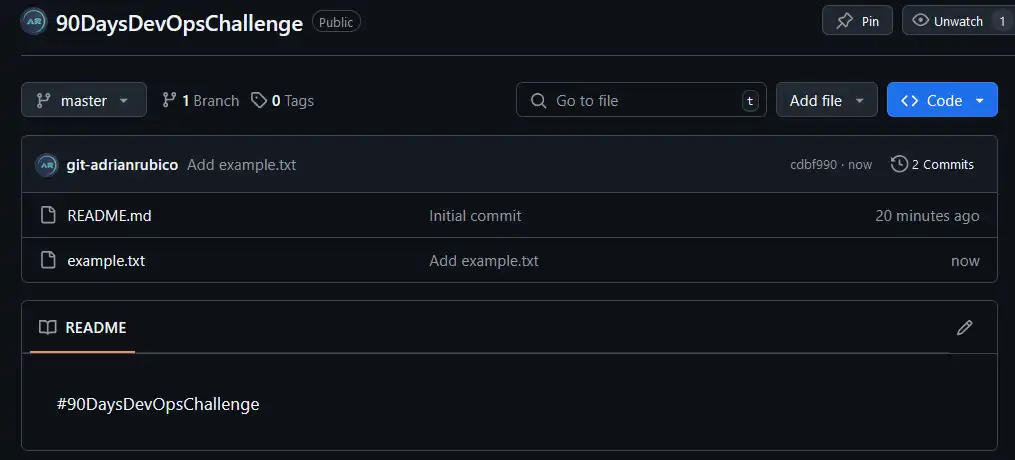
Navigate the Git Logs
The Git log is a powerful tool for seeing the history of your commits. Here's how to use it:
- View the commit history:
git log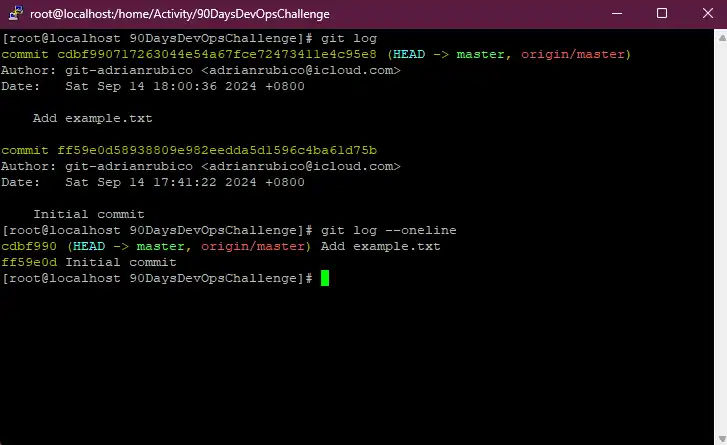
💡 You can also use flags like --oneline for a more concise view
Wrapping Up
Our blog covered the essential steps to get started with Git and GitHub, from setting up a local repository to pushing your first file to a remote repository. These foundational skills will prove essential as you explore Git in future tasks. Our next blog will focus on rolling back changes in Git, an important tool for managing your code.
Day 10: Navigating the Basics of Git and GitHub
Learn the basics of Git and GitHub, from setting up a local repository to pushing your first file
For the passion of automated cloud solutions.
Subscribe to get the latest posts. I mostly write about Backend (Python/Bash), DevOps and Linux.