Day 36: Mastering Terraform Backend
Aug 19, 2025
•06:02 PM GMT+8
When working with Terraform, state management plays a crucial role. By default, Terraform stores the state file locally, which can cause problems in collaboration, versioning, and reliability. A backend defines how and where Terraform stores state, enabling better collaboration and consistency across teams.
Problem
By default, Terraform stores the terraform.tfstate file on your local machine. This can quickly become a problem:
- If your local file is lost or corrupted, your infrastructure tracking is gone.
- Collaboration becomes difficult since teammates don’t have access to the same state.
- It can lead to inconsistencies and errors when applying changes.
Solution
The solution is to use a remote backend. A backend defines where Terraform stores its state data files and how operations like plan and apply are executed.
Using a backend provides several benefits:
- Centralized state management for teams.
- Enhanced collaboration, as multiple engineers can work on the same infrastructure safely.
- Security and reliability, since state files are stored in managed services like Azure Storage.
Task
Let's walk through setting up an Azure backend for Terraform.
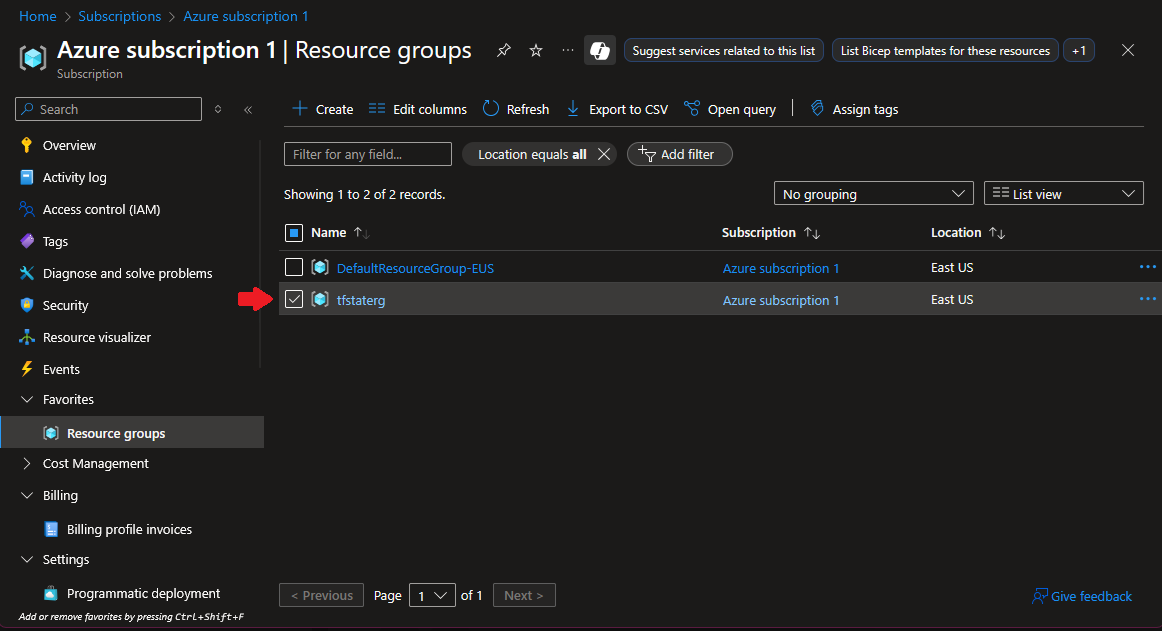
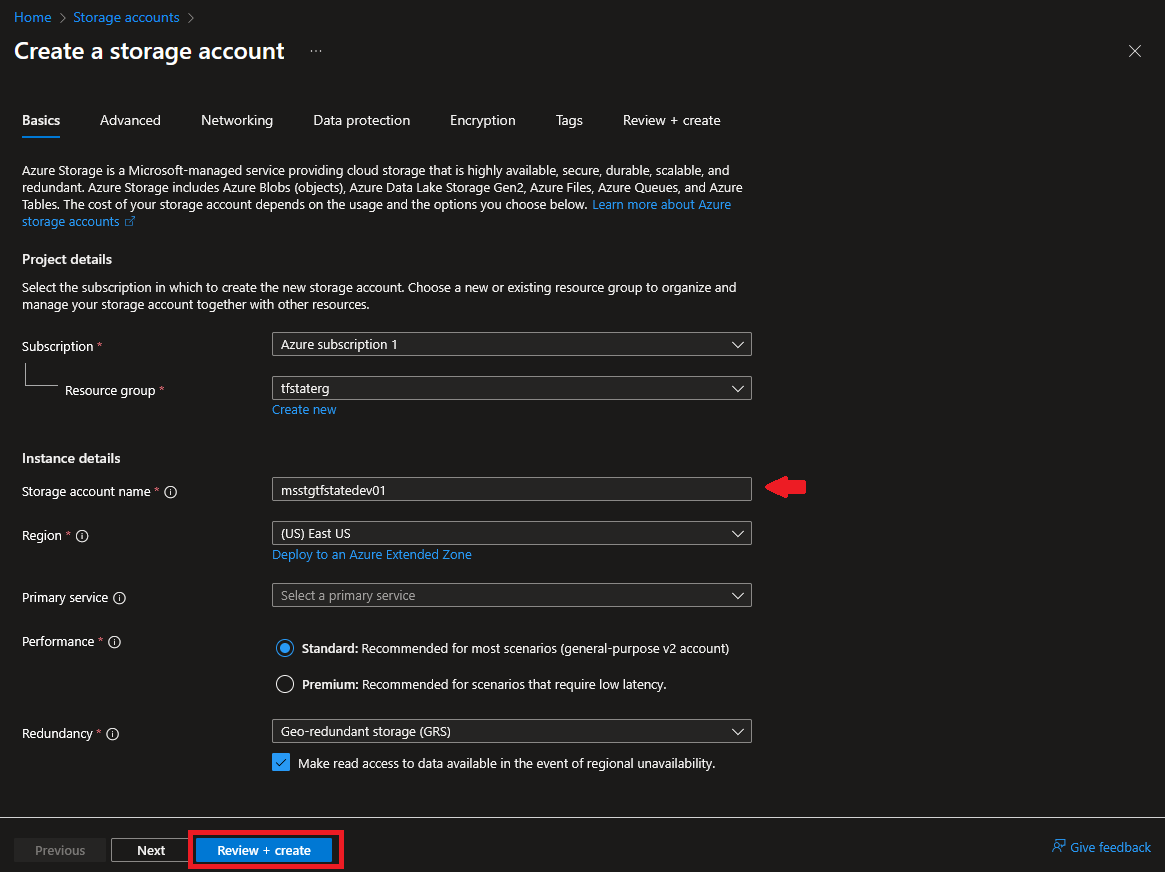
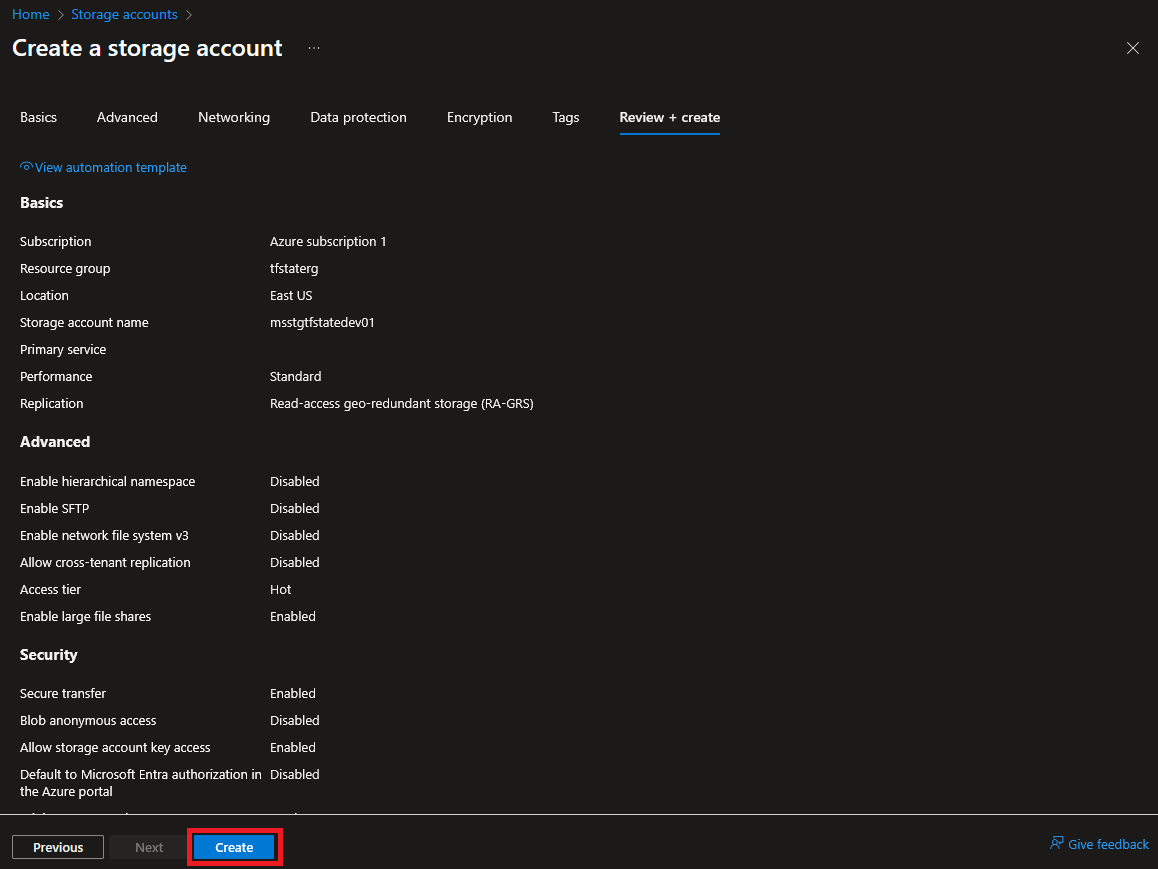
Step1: Create Resources in Azure
- In the Azure Portal, create a new Resource Group named
tfstaterg. - Create a Storage Account named
msstgtfstatedev01(use the default settings).
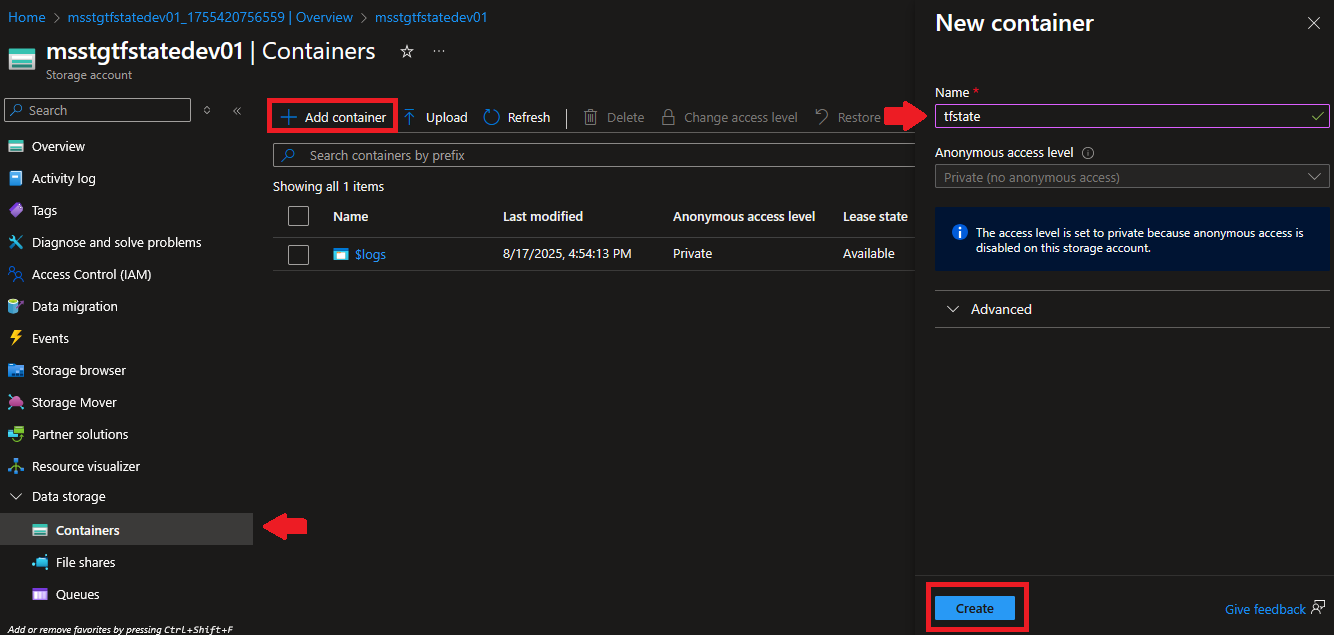
Step 2: Create a Container in Azure Storage Account
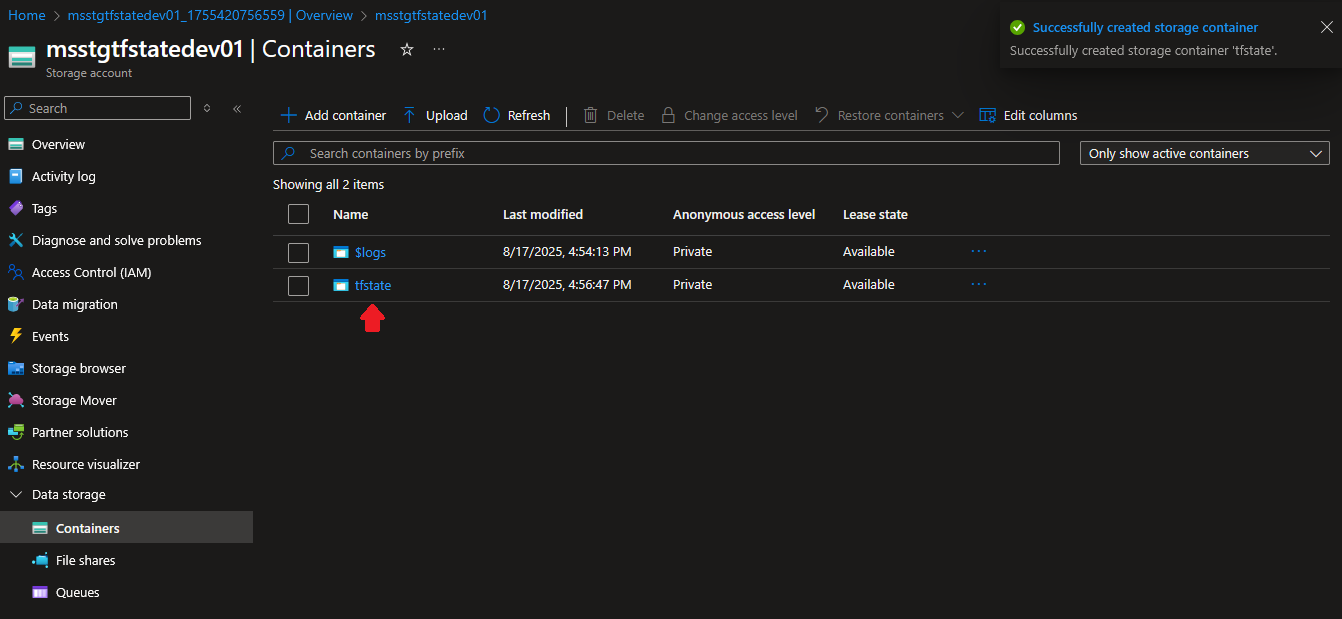
After the storage account is successfully created, go to its Data Storage section and create a container named tfstate. This container will store the Terraform state file.
Step 3: Clone The Repository
Start by cloning the sample repository and navigate to the backend directory.
git clone https://github.com/git-adrianrubico/learn-terraform
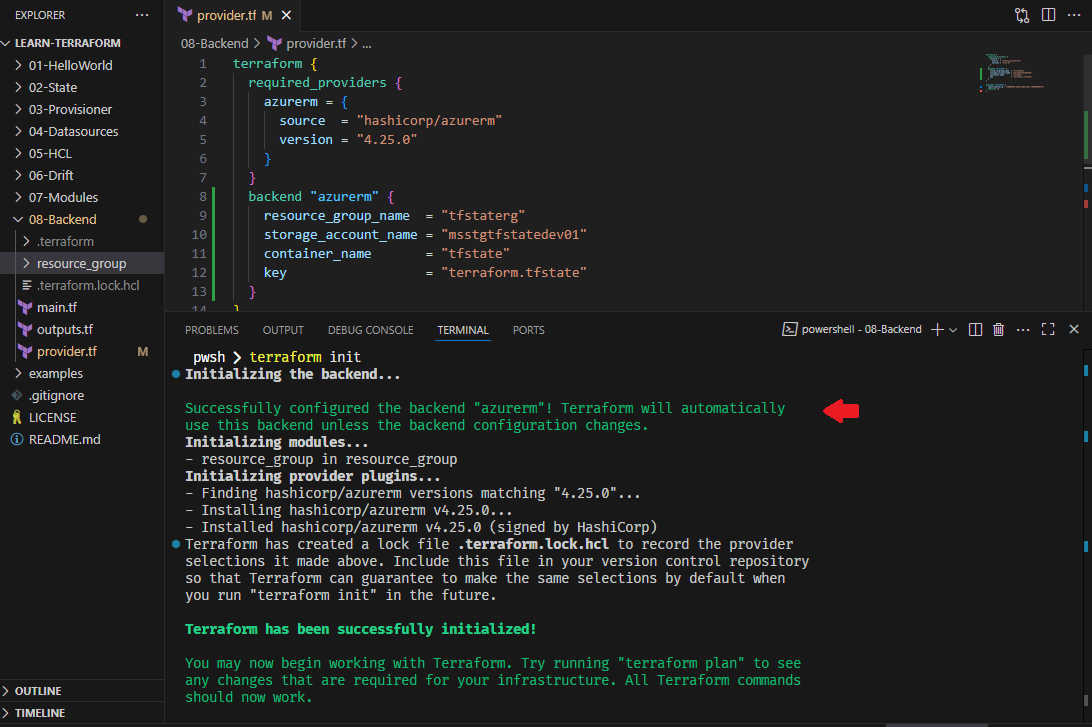
cd learn-terraform/08-BackendStep 4: Update the provider.tf
Inside the terraform block, add the backend configuration:;
backend "azurerm" {
    resource_group_name  = "tfstaterg"
    storage_account_name = "msstgtfstatedev01"
    container_name       = "tfstate"
    key                  = "terraform.tfstate"
}
Step 5: Terraform Apply
Run the usual commands:
terraform init
terraform plan
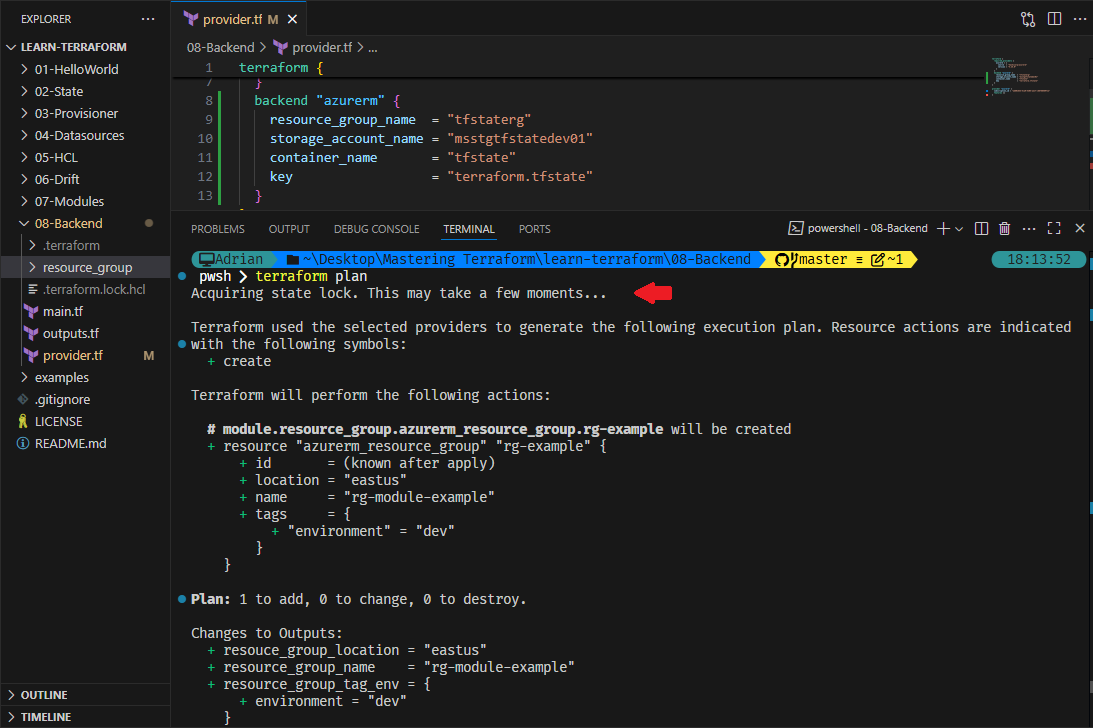
terraform apply
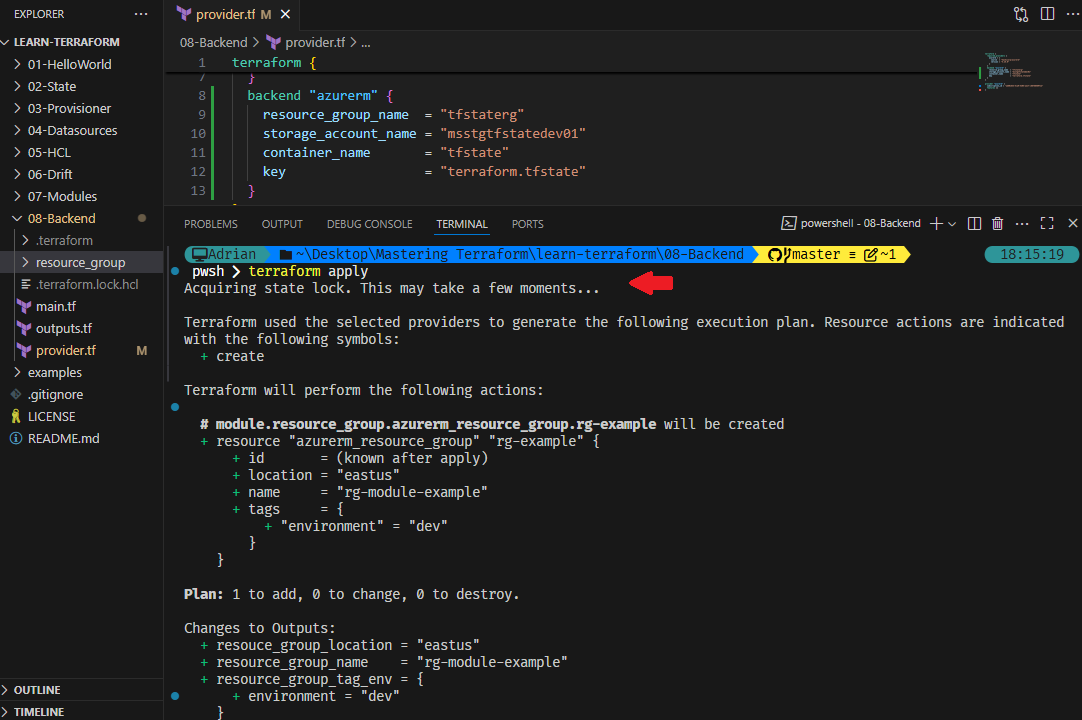
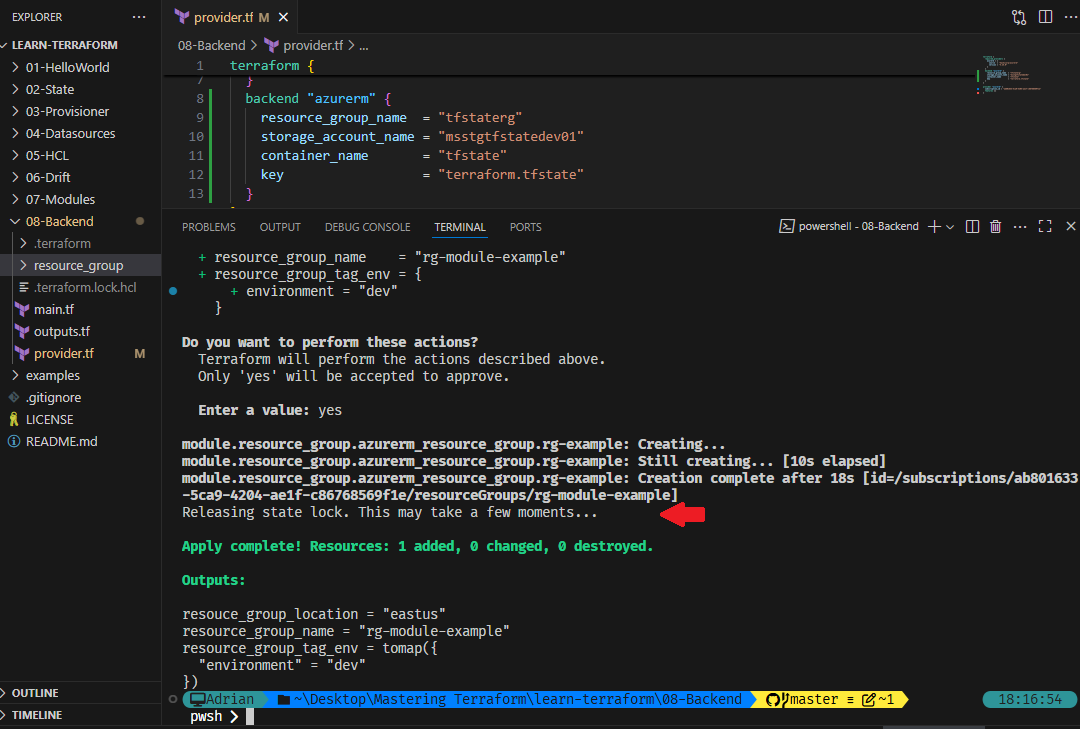
This tells Terraform to store the state file in the Azure Storage account rather than locally.
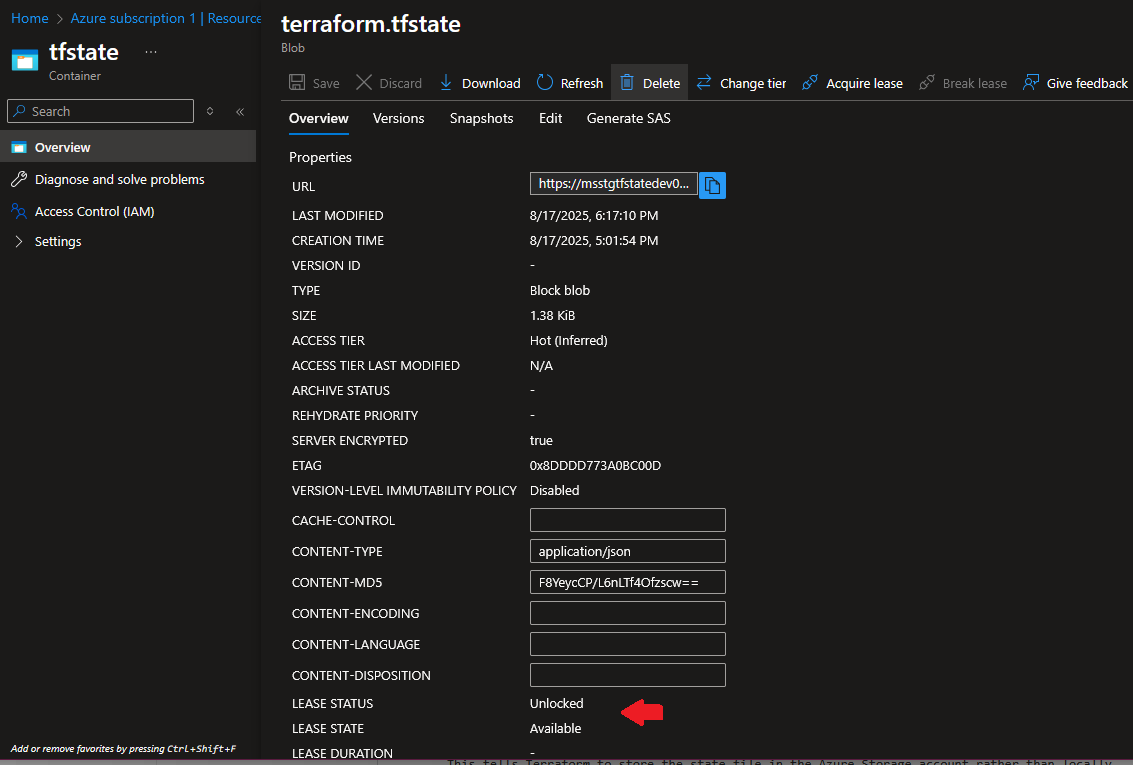
Step 6: Verify the State in Azure Storage
Go to the Azure Storage Account → Containers → tfstate.
- You will see the terraform.tfstate file.
- Notice the Lease Status and Lease State. This ensure that only one Terraform operation can modify the state at a time.
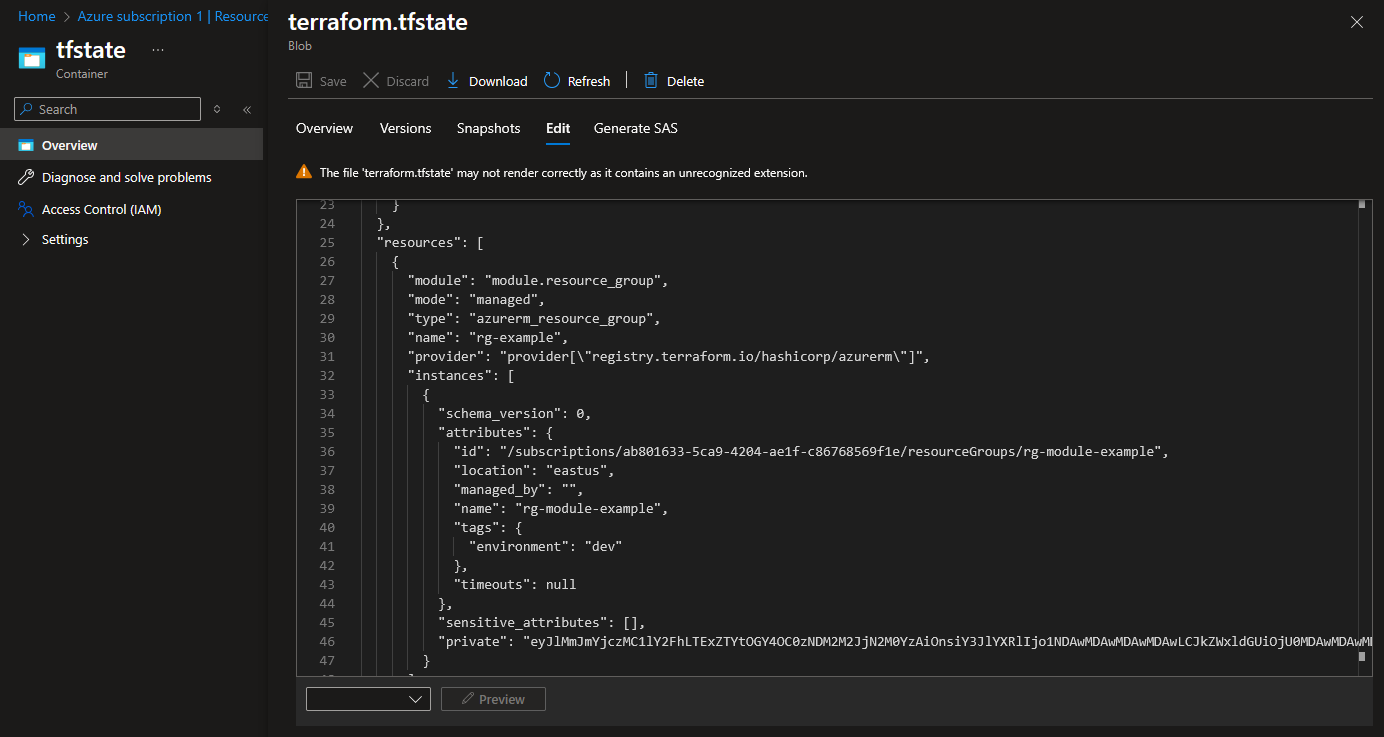
Step 7: Quick View of the State File
You can also preview the Terraform state file directly in the Edit tab of the tfstate container. While it is not recommended to edit it manually, viewing it helps you understand how Terraform is tracking your infrastructure.
Conclusion
We explored how to configure an Azure backend for Terraform and why it’s essential for collaboration and reliability. By centralizing your state file in Azure, you reduce risks, improve teamwork, and gain better control over your infrastructure.
With this, we’ve wrapped up the Terraform series. The last series of our #90DaysDevOpsChallenge will be about Getting Started with Azure DevOps.
Day 36: Mastering Terraform Backend
Learn Terraform remote state storage with Azure, ensuring collaboration, consistency, and secure state management across environments.
For the passion of automated cloud solutions.
Subscribe to get the latest posts. I mostly write about Backend (Python/Bash), DevOps and Linux.